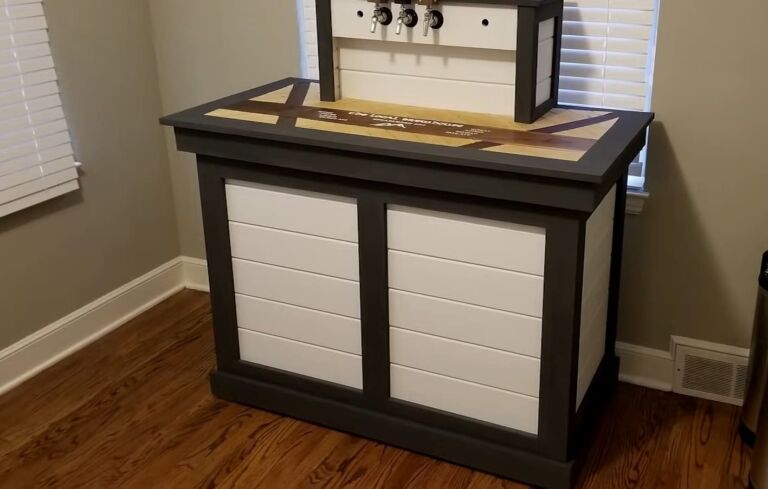

DIY Conical Fermenter
Homebrewing your own beer can be a gratifying hobby. But taking your homebrew setup to the next level requires more advanced equipment like a conical fermenter. Constructing your own conical fermenter is an ambitious DIY project, but it allows you to customize your fermentation vessel fully. Building a conical fermenter from scratch enables precise temperature control, easier transfers, and better yeast harvesting. With some technical skills and suitable materials and tools, you can build a high-quality DIY conical fermenter that will improve your homebrewing process. This DIY project takes homebrewing equipment to new heights.
Recap in Brief
A conical fermenter allows homebrewers to take their craft to the next level. Building your own conical fermenter is an advanced DIY project but gives you complete customization and control. The conical shape makes transfers more accessible, improves clarity, and allows for yeast harvesting from the collection ball valve. The key steps are constructing the conical vessel, installing a cooling system, adding ports and valves, integrating temperature sensors, and attaching the collection ball valve. With proper sanitation and materials like stainless steel or plastic, you can brew fantastic beer on a budget with your own DIY conical fermenter. This project requires skill but lets homebrewers mimic commercial-scale equipment.

Materials needed for building a DIY conical fermenter
Building your own conical fermenter from scratch is an ambitious DIY brewing project. You must source various specialized materials and components to construct a fully-featured, high-quality conical fermenter. The materials serve critical functions in the fermenter design, enabling precise temperature control, simplified transferring and yeast harvesting, and peak fermentation performance. Carefully sourcing these materials is the first step in fabricating a DIY conical fermenter.
Constructing the conical vessel is the foundation of the project. Choose between stainless steel for durability or food-grade plastic for affordability. Fittings, valves, seals, and other hardware maximize functionality. Temperature control and monitoring components let you dial in perfect fermentation temperatures. You can build a DIY conical fermenter with quality materials and a purposeful design that rivals professional brewery equipment.
Conical Vessel Materials
The conical fermenter vessel can be fabricated from:
- Stainless Steel is the most durable material option but requires steelworking skills. Allows for sanitary welds. Go for 304 or 316 stainless.
- Plastic – Typically made from PET or HDPE. It is more affordable and more accessible to work than stainless, but more prone to scratching over time. It must be food-grade and BPA-free.
- Premade Kits – Some brewing equipment suppliers sell premade conical components ready for assembly. Eases construction.
Fittings and Hardware
- Weld fittings – Use tri-clover or similar weld fittings to create removable, sanitary ports for valves, transfers, cleaning, etc.
- Valves – Include sample valve, racking valve, blowoff valve, PRV, and optionally a yeast collection ball valve. Go with stainless steel valves rated for beverage use.
- Seals – Silicone seals and proper clamping allow installation of airtight, sanitary valves and fittings.
Temperature Control Parts
- Cooling jacket – Install a glycol cooling jacket around the conical vessel for temperature control.
- Chiller system – Use a glycol chiller or refrigerated water system to circulate cold fluid through the jacket.
- Thermowell – Allows temperature probe or sensor to be immersed in the fermenting beer.
- Controller – Device to monitor thermowell sensor and control the chilling system to maintain setpoint.
Additional Materials
- Stand or mounting system – For safely securing the fermenter vessel in place.
- Insulation – Wrap the container with insulation to maximize cooling efficiency.
- Tubing – Food-grade tubing for transferring beer in and out of the conical. Silicone tubing is recommended.
- Sanitizers – PBW and Starsan for cleaning and sanitizing before brewing.
Tools
Constructing a DIY conical requires an assortment of fabrication tools:
- Metal cutting tools – angle grinder, cutoff wheels for stainless steel work
- Drill and drill bits – for all necessary ports and openings
- Welder – for stainless steel vessels
- Wrenches – for assembling fittings and valves
- Measurement tools – calipers, markers, etc.
With high-quality materials, purposeful design, and the right tools, you can fabricate an exceptional DIY conical fermenter to take your homebrewing to the next level. Pay close attention to material selection, and don’t cut corners.

Steps for building a DIY conical fermenter
Constructing your own conical fermenter from scratch is an advanced DIY brewing project. Careful planning and execution of each critical fabrication step will result in a high-quality, custom fermentation vessel. Follow these key steps carefully to build a top-tier DIY conical fermenter.
Building a conical fermenter requires technical skill, patience, and adherence to sanitary brewing methods. But the end result is worth the effort. Your homebrewed beer will reach new heights of quality and consistency with a custom-built conical fermenter.
Design and Plan the Fermenter
- Research designs and components needed
- Measure your available space to fit the fermenter
- Use 3D modeling software to design your fermenter digitally
- Source all necessary materials and parts before starting
Fabricate the Conical Vessel
- Cut and weld stainless steel into a conical shape or thermoform food-grade plastic
- Smooth all interior surfaces – avoid scratches
- Install tri-clover or weld fittings for the necessary ports & valves
Add Ports, Valves, and Accessories
- Drill holes for sample valve, racking valve, thermowell, etc.
- Add blowoff arm, PRV, CO2 inlet, and any other valves wanted
- Use silicone seals and clamps to create removable, sanitary fittings
Install Temperature Control System
- Attach a premade cooling jacket or weld cooling coils onto the exterior
- Add insulation around the vessel to maximize cooling efficiency
- Install thermowell and temperature controller
Assemble Stand and Mount Fermenter
- Use a sturdy stand with strong welds if metal or robust framing if wood
- Securely mount the fermenter to prevent tipping or shifting
Test for Leaks and Sanitize
- Pressure test for any leaks around seals, valves, or fittings
- Thoroughly clean and sanitize entirely before first use
With meticulous planning, high-quality components, and flawless execution, you can construct an exceptional DIY conical fermenter that will take your homebrew to the next level.

Tips for using a DIY conical fermenter
Building your own conical fermenter takes dedication and skill. But the work continues once construction is finished. Properly using your DIY conical fermenter will ensure you get the most out of this advanced brewing equipment. Follow these tips to maximize the benefits of fermenting in a conical while avoiding common pitfalls.
Basic Conical Fermenter Use
Using a conical fermenter involves a few key steps:
- Fill conical through the top opening with chilled wort
- Aerate thoroughly before pitching yeast
- Seal openings and fit airlock or blowoff tube
- Control temperature precisely per yeast strain
- Allow beer to ferment fully, monitoring the gravity
- Cold crash before transferring finished beer
The conical shape and precise temperature control allow clean, consistent fermentation cycles.
Transferring Beer
- Use an auto-siphon with tubing attached to the racking port
- Transfer slowly to minimize splashing and oxygen exposure
- Avoid transferring yeast by stopping when sediment reaches the port
- Shut and sanitize valves after transferring to prevent contamination
Cleaning and Sanitation
- Disassemble valves and fittings for thorough cleaning
- Use brewery wash like PBW to remove residue
- Rinse thoroughly before sanitizing with stars
- Re-lubricate o-rings to maintain seals
Proper cleaning prevents beer stone buildup and off-flavors.
Avoiding Problems
Some common issues and solutions:
- Leaking valves – replace o-rings or tighten clamps
- Inadequate cooling – insulate the vessel and upgrade the chiller
- Infection – improve sanitation and smooth interior
- Foaming overflow – use a blowoff tube for high-krausen
- Stuck fermentation – ensure healthy pitch rate and aeration
With practice and care, your DIY conical will produce consistent, high-quality homebrew batches.

FAQ
What skills and tools do I need to construct a conical fermenter?
You’ll need experience with metalworking and welding if using a stainless steel vessel or plastic working if using a plastic conical. Welding stainless steel sanitarily is an acquired skill. Water jet cutting the conical halves is ideal. You’ll also need drilling tools for all the necessary ports and bulkheads. Familiarity with plumbing, wiring, and fabrication is critical. Software for designing the fermenter digitally first is helpful. Temperature control requires electrical skills. Patience and problem-solving abilities are also vital for a smooth build.
What are the recommended materials for constructing a DIY conical?
For the conical vessel, stainless steel and plastic are the most common choices. Stainless steel is more durable but requires expert welding skills. Plastic is easier to fabricate but may scratch over time. Food-grade plastic like PET is recommended. Nonetheless, stainless steel is preferred for longevity and impermeability. All fittings, valves, seals, etc., should be stainless steel. Silicone tubing works for transfers. Tri-clover clamps offer excellent seals and modularity. Avoid any leaching materials like certain plastics. Research all component materials thoroughly.
How can I control the fermentation temperature in my DIY conical fermenter?
Installing a high-quality cooling jacket is the best temperature control method. Use glycol or refrigerated water circulated through the jacket around the conical vessel. This transfers heat efficiently. Integrate a temperature control system with a probe in direct contact with the fermenting beer. The controller can actuate a cooling solenoid valve to chill the glycol/water when the beer rises above your setpoint. Some also use wrap-around cooling mats, which are less effective for conicals. Perfect fermentation temperature control takes some testing and tweaking.
What design factors should I consider when planning my build?
Consider the vessel dimensions, number, and locations of ports, accessories like temperature probes and sample valves, ease of assembly and cleaning, compatibility with other brewing equipment for transferring, etc. Scale the size to your typical batch size, allowing ample headspace. Flexibility is vital; leave room for potential additions like more probe ports. Design it digitally first using 3D modeling software. Overbuild the chiller capacity. And make it easily disassembled for cleaning and maintenance. Anticipate kinks now to maximize functionality later.
What mistakes should I avoid when fabricating my conical fermenter?
Avoid weak welds that can leak and expose beer to oxygen and bacteria. Don’t use any materials that could leach chemicals or odors into the wort. Prevent any dead spaces where liquid or gunk can collect. Please don’t skimp on cooling capacity; it’s better to overbuild than underbuild it. Avoid placing ports where they’ll quickly get clogged with sediment. Make sure to look at smooth interior finishes, which limit the surface area for beer to cling to. Always check for leaks and test thoroughly before first use. Rushing any steps during fabrication risks producing a subpar fermenter. Take your time and adhere to brewing best practices every step of the way.
How difficult and expensive is this project compared to buying a conical fermenter?
Building your own conical fermenter is significantly more difficult and expensive than purchasing a premade one. The process requires metalworking/plasticworking skills, specialty brewing equipment, and lots of research and planning. However, it allows complete customization for your specific needs. The cost can easily exceed $ 1,000 depending on components, hardware, tools, etc. But in return, you get precisely the conical fermenter you want. For most homebrewers, buying a conical is more practical than fabricating one. Yet, building your own can be challenging for those with the expertise and passion.
What safety precautions should I take when constructing and operating a DIY conical?
Proper PPE during fabrication is critical—eye and ear protection, respirators when welding or cutting plastic, etc. Electrical and wiring should be handled carefully and properly grounded. Anything containing beer must be food-safe and cleanable. Avoid sharp edges. Regularly check for leaks and fix any compromised seals or gaskets. Before first use, clean and sanitize the entire conical with brewing-approved chemicals. During fermentation, use blowoff tubes to avoid pressurization. Keep fermenters secured and avoid tipping hazards. Only allow qualified individuals to operate DIY equipment. Prioritize safety throughout the entire build and use process.
Related Video: WHICH HOMEBREW FERMENTER SHOULD I BUY?
Summarize
Constructing your own conical fermenter is the ultimate DIY brewing project. It requires dedication, skill, and research to design and build. But the results are worth it. You’ll gain complete control over fermentation temperature, clarity, and yeast harvesting. Your homebrew will reach new heights of quality. Though it demands time and effort upfront, a DIY conical fermenter will serve you for years to come. In the world of homebrewing, taking the step to conical fermentation separates the casual brewer from the genuinely committed craftsman. If you are passionate about brewing excellence, fabricating your conical fermenter is a challenge. The final product will be a sight to behold and produce beer to savor.